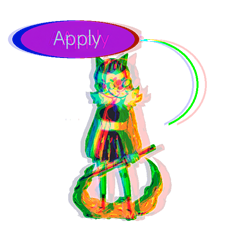
How I Made the Glitch Effect (And How You Can Use It)
“Glitch,” or “chromatic aberration,” is a super popular effect that mimics interference on old CRT screens and VHS tapes. It gives your art that retro-digital, and sometimes unsettling, vibe. In this guide, I’ll show you how, using my online editor, you can create this effect with full control—and yes, without code.

I’ll show you how to create cool glitches and distortions right in your browser.
The Secret Sauce: Displacement and Aberration
I packed two powerful techniques into this single shader:
- Displacement: For this, I use a second texture (a so-called “displacement map”) to distort the main image. You have full control over the strength (
dispAmt) and scale (dispSize) of these distortions. - How Displacement Map Colors Work:
- Red channel (R): controls horizontal (X) displacement.
R = 0 (black) — maximum left, R = 0.5 (gray) — no shift, R = 1 (red) — maximum right. - Green channel (G): controls vertical (Y) displacement.
G = 0 (black) — maximum up, G = 0.5 (gray) — no shift, G = 1 (green) — maximum down. - Blue channel (B): usually ignored, but can be used for custom effects.
- Red channel (R): controls horizontal (X) displacement.
- Chromatic Aberration: This splits the red, green, and blue channels of the image and shifts them slightly. In my shader, you get separate X/Y controls for each channel, so you can create any effect you want.
Tuning the Perfect Glitch
I believe the key to a great glitch is in the details. That’s why I’ve exposed all the important parameters in the editor for you to tweak:
- Displacement Strength (
dispAmt): Controls how much the displacement map bends your image. The higher the value, the stronger the distortion. - Aberration Controls (
abberationXR_xetc.): A whole set of six sliders to independently move the R, G, and B channels horizontally and vertically. - “Halo” Effect: I even taught the shader to add a subtle colored “halo” around the edges of transparent sprites. This makes the effect look more natural and cool.
Under the Hood: The Code
This powerful effect runs on a pretty flexible Godot-style shader I wrote. All its parameters are exposed in my no-code editor, so you can experiment as much as you want.
shader_type canvas_item;
render_mode unshaded;

// Displacement map texture
uniform sampler2D displace;
// Displacement amount
uniform float dispAmt : hint_range(0.0, 0.1) = 0.05;
// Chromatic aberration controls
uniform float abberationXR_x : hint_range(-0.05, 0.05) = 0.0;
uniform float abberationXR_y : hint_range(-0.05, 0.05) = 0.0;
uniform float abberationXG_x : hint_range(-0.05, 0.05) = 0.0;
uniform float abberationXG_y : hint_range(-0.05, 0.05) = 0.0;
uniform float abberationXB_x : hint_range(-0.05, 0.05) = 0.0;
uniform float abberationXB_y : hint_range(-0.05, 0.05) = 0.0;
// Displacement scale
uniform float dispSize : hint_range(0.1, 2.0) = 1.0;
// Maximum alpha
uniform float maxAlpha : hint_range(0.1, 1.0) = 1.0;

void fragment() {
    vec4 disp = texture(displace, UV * dispSize);
    vec2 newUV = UV + disp.xy * dispAmt;

    vec2 abberationR = vec2(abberationXR_x, abberationXR_y);
    vec2 abberationG = vec2(abberationXG_x, abberationXG_y);
    vec2 abberationB = vec2(abberationXB_x, abberationXB_y);

    float r = texture(TEXTURE, newUV - abberationR).r;
    float g = texture(TEXTURE, newUV + abberationG).g;
    float b = texture(TEXTURE, newUV + abberationB).b;
    float base_alpha = texture(TEXTURE, UV).a;

    float alpha_r = texture(TEXTURE, newUV - abberationR).a;
    float alpha_g = texture(TEXTURE, newUV + abberationG).a;
    float alpha_b = texture(TEXTURE, newUV + abberationB).a;
    float halo_alpha = max(max(alpha_r, alpha_g), alpha_b);
    float halo_strength = 0.2;

    float out_alpha = base_alpha * maxAlpha;
    if (base_alpha < 0.01 && halo_alpha > 0.01) {
        out_alpha = halo_strength * maxAlpha;
    }

    COLOR = vec4(r, g, b, out_alpha);
}
Ready to make your own glitches?
Jump into my free online editor and apply distortions and aberrations to your sprites right now.
Try the Glitch Editor